Thursday, 14 May 2015

PERSONAL DEVELOPMENT PLAN_ Review

This report is a summary reflecting on my near completion of the Fashion and Textiles Year 1. It is very interesting to consider the processes and techniques I have learnt throughout the year, and also the experiences, achievements and areas of improvement that has all shaped my first year.

I chose to continue my study at Colchester School of Art after completing my foundation course with a merit. I wanted to gain a degree in fashion, and my heart has always lied within this university. I fell this is because, not only does it offer fashion and textiles combined, but it also offers a lot in terms of facilities, industry and work placement, and also being in an environment I am familiar with. My motive to complete this degree is to be able to run my own company within the fashion industry. 

I feel University is a massive step up from the education I have been in previously, it takes a lot more commitment, time management and organisational skills, passionate and driven attitude, motivation, hard work and a wish to succeed, an understanding of the course expectations and requirements, and of course a commitment to the fashion industry.

FUTURE GOALS_

Short term goals:
Pass my first year successfully with a strong understanding and skill needed to build with for the second year
Stick to smart action plan and have completed on review date
Develop presentation skills to become a more all rounded confident speaker 
Start creating sample garments to build up my business, start selling in Bestdays. 

Mid term goals:
Build up my list of contacts within the industry and continue to do work placements to gain experience
Continue to develop a style, something that makes me unique and stand out
Hopefully reach my full potential in the third year with a strong final collection. Show this as graduate fashion week/ new designers
Work on my business and continue to sell garments made with the skills I have developed on my course, on website and shop, hopefully expand

Long term goals:
I hope after having completed my course I will have  a clearer idea about the position I am in as to were I want to go. I want to continue on my clothing business, hopefully expand and create new and exciting garments, however I am not sure if this will be the main thing I concentrate on. By taking part in job placements within the industry, I might be in a better place to decide the specific career path I would like to pursue. I already have a Visual Merchandising job offer waiting for me at my current place of work, so I will put that into serious consideration. MultiMate goal is to have a successful fashion business of my own, as I am ore of an independent worker.

What am I good at?:
Time management 
Organisational skills
Technical processes and designing skills in fashion construction 
High drive to succeed

What could I improve?: 
Presentational skills and confidence
Motivation and belief in self
A wide range of research
Photoshop skills

How could I improve?:
Practice speaking to as many people as possible about my work
Make use of the resources and tutors to help me with my work
Don't always put myself down, find positives in every piece of work I produce
Research using a range of resources, visits, interviews etc

To achieve my goals, I will really have to push myself. But I want to succeed. This means constantly developing my skills, but using my own style and personality to make it exciting. I have a very helpful and willing set of tutors who want me to succeed, it’s perhaps me who needs to become re-motivated. I also plan to stick to my action plan to stay on track of my goals over the break.

I have learnt so much in the first year, all in such a short space of time. It was very important to attend every session, right back to the introductory sessions where things were introduced. I have progressed a great amount, and feel very proud with what I have learnt.It was important for me to have a foundation knowledge, but the technical skills and textile processes were all new experiences. Not only have I made a successful start and my goals are becoming more realistic, but I myself have become a lot more confident and happy- purely because I made a choice to continue in a career path that I enjoyed.

SHIFT DRESS DEVELOPMENT_


SHIFT DRESS DEVELOPMENT_ 

The fashion construction support module was going very successfully. I had gained many skill from completing the samples, and further knowledge from continued research and development. The thing I like about construction is the fact there is a recipe- Once you have got that right, it’s easier to put a garment together.


The garment we create in the support module is a shift dress. After deciding on my design, I began to make the pattern. As I have already completed two completely different patterns, I was a lot more confident than when I had started out, and needed little assistance to create my desired design. The only part I became stuck on was the gathered section to my dress- I didn't know how much to add on. It turned out it needed to be chopped up and flared, so something new was learnt there.
Once my pattern had been completed and the fabric cut out it was tie to put the dress together. I was very confident at putting the front panels in- I seem to be one of those people who when something is shown to them, it clicks and I understand it. I quickly inserted my pockets on the middle section, and added the gathers. The gathers could have been distributed more evenly, but that can be for future development. 
I started to think that I was playing the design too safe- I really liked the idea of a sporty, racerback shift dress, but could I have added more to make it more visually stimulating? 
I decided to add small detail such as piping around the arm hole, which was a massive success. This was actually quite a difficult thing to do, purely because it was so fiddly. But the outcome was that it looked professional and had a finished effect, and just made it look that much more attractive. 


I am nearing the end of the module and am coming close to completing my dress. It is very exciting to be able to see my dress come to life from a once sketchy design, and that’s what I adore about construction. It is all a massive learning curve, so whatever happens when constructing a garment will eventually (hopefully) be really exciting, regardless if you intended it.

SUPPORT MODULE_ SAMPLES

 The support module has been a great starting point for developing my construction skills. As a fashion and textiles student, I found it rather embarrassing of the fact I could barely put together a garment. By following the simple steps of putting together samples such as pockets, seams and zips did wonders for my technical skills, and feel really confident when putting them together. I am really pleased with how far I have excelled, and although there is always room for improvement, I feel the quality of the samples produced are high.

Here are some examples of the samples I have produced:


Double turned hem                   Flat felt seam                       Plain seam                                         


Off centre zip in open seam                5 thread seam on stretch fabric                    Centred zip in closed seam


Bound open seam                   Curved seam                    Insert seam                                       


SMART ACTION PLAN_


PRINT DEVELOPMENT_


PRINT DEVELOPMENT_

For me, fashion construction has always come more naturally to me. It has more of a recipe to follow, whereas I get left behind with print making. I struggle with the composition and making of the print- layering it up and choosing the colours. In the first semester, I didn't take to the textiles half- and definitely not photoshop. 

To start off with, I chose 6 pages in my sketchbook that I thought related well to my theme and research. This was to help me keep my way, and as a way to refer back to and include the important parts of my research. From this, and keeping the theme of the Bowery 1970s, I began to crete background ideas using different media. Drawing on my experience from the jumpsuit designing, I started with simple shapes and mark making based on first site and the 70s. This was t give me a rough idea, and I could refine these down. I started to play around with cutting out interesting textures into shapes and repeating them, such as a herringbone shape (featured in first site)- this worked really well. 
for me the ideas did not come naturally, and the motifs looked dull. I do struggle at line drawing, it doesn't fit my personality. Then it clicked- why do the motifs have to be so precise? It would look a lot more interesting with sketchy motifs, and it would also fit the gritty mood I wanted to suggest. I found it quite hard to come up with specific motifs, they were mainly shapes taken from first site.

I usually have more of a hands on approach, and like to do my work by hand- I often struggle on the computer. Using my skills from the previous semester, I created large scale 50x50cm prints using photocopies and mark making. In my eyes, these were successful, but not as a main print. Perhaps more relevant as a companion print, theses large scale prints were a little simple. This could have been due to the scale an also the time it took to cut out the components, but I just wasn't clicking with this method of print making. I decided to have a go at photoshop (brave of me due to the last experience). Its not that I cant do it, its just a frustrating piece of software. However it does have its pluses, as it is a lot easier and quicker to create a detailed and complicated print. Believe it or not, this semester I actually worked well with photoshop. Now it took me a while to get the hang of it, I felt rather slow compared to everyone else (comparing is something I have to stop). The prints I was producing seemed to be relevant to my theme, and with more work and development they could be something special. What I learnt this time around was to tweak prints and change small things to build up a print collection, rather than starting over each time. 

I really enjoyed layering up the sketchy marks and lines to create interesting prints, and even in the monochrome it looked great. A technique that was really successful was blowing up a textured motif- it was a painted dot to be precise. The detail was accentuated when the scale was increased and when layered they suggested an eery print. 

The colour palette, based on the hardships and distressing years of the Bowery in the 70s, was effective when applied- luckily both textural prints and subtle colours worked together. However, these prints were great for companion prints (although I rather liked the simplicity), but I felt I needed some really built up prints, just to see how they turn out. I was stuck, and everything I layered up in an attempt to do this didn't look how I wanted it too, it was just messy and chaotic. It was suggested to me in my module review that I should use photos in my prints, much like Dries Van Noten’s SS 2012 collection. The images of the Bowery, taken by Leland Bobbe, were incredibly dark, mysterious and gritty. They were truly inspirational and had shaped my project, so what a better idea to incorporate them. I cut the image up, copied it into shapes, layered on top of it. These to mw were incredibly successful, and will hopefully be the main body of my print collection. 


I seem to have a love hate relationship with photoshop. However this semester it has treated me well. In a way, I feel slightly more inclined towards textiles, and will definitely consider textiles for fashion. 

PDP PRESENTATION_ WORK DEVELOPMENT

PDP PRESENTATION_ WORK DEVELOPMENT

Presentation plan_
1970s-
_ Slide 1, introductory slide 
_ Slide 2, building choice (shoe world) and what attracted you to it. Use sketchbook to show drawings of the site
_ Slide 3, show pinterest boards and what inspired you from the 70s (fashion, lifestyle, social, music, interiors, colours)
Refined 1970s Research-
_ Slide 4, Thea Porter exhibition (talk about garment shapes, colours, pattern)
_ Slide 5, bowery pics, relation to work, different view on the 70s. Show dress drawings with 70s architecture, sense of scale, print ideas, garment structure/shape
Firstsite-
_ Slide 6, first site inspiration. Sketchbook showing selection of drawings from firstsite, A1 Drawings, what to include in jumpsuit idea, using drawings to create jumpsuit
Jumpsuit-
_ Show selection of initial jumpsuit ideas
_ Go to folder and show final line up and and coloured drawings
_ Show join up of jumpsuit and final drawing
_ Slide 7, making the jumpsuit, with sewing order, personal feeling on outcome (things changed etc)
Print Collection-
_ Slide 8, Show sketchbook pages that suggested the direction wanted to take
_ Slide 9 print inspiration(pinterest) (textural, sketchy)
_ Show selection of background ideas, motif ideas (sketchbook), 50x50 prints
_ Show print collections in folder
_ Talk about using pictures in work, bowery pics (folder)
_colour palette?
Development-
_ Slide 10, development through the year, change in direction (a lot more inclined towards textiles for fashion)
_ Slide 11, future plans

Outcome-
The last presentation of the year (thankfully). I was unnecessarily scared due to the fact it was at the Minories, out of comfort zone of university. As I walked into the large room, it had been set out like a judging panel- table at the head of the room where the tutors sat, a place to present your work and chairs behind for your peers to sit and watch. I wasn't first, which I was actually glad about. I managed to get a taste of the length and structure from Amber who went before me. However I was still shaking as I got up in front of my ‘judges’. I tried to start off confidently, addressing my audience and being as engaging as possible. But I kept getting tongue tied and messing up due to my nerves. I relaxed as I continued, however I was concerned about my time limit, making me rush the presentation. 10 minutes does seem a long time, but when you are actually up there, you find you have a lot more to talk about than you first thought. I didn't want to miss anything out, but it was evident that I had produced a big body of work during semester 2. Like the previous presentation, there was a timer set at 8 minutes. to most this was a help, but it actually worried me more. I believe I definitely went over 10 minutes, although this didn't appear an issue, and it was a recurring problem with everyone. 


Overall in my eyes I feel the presentation was successful. It was mainly an issue with my presentation skills that held me back, not a lack of physical work. I felt I could be a lot more confident, especially as I am rather proud of my work, and perhaps this wasn't evident. Doing regular presentations definitely helps when it comes to communication and confidence (as much as I hate them). Its definitely something I continue to work on, even if its presenting my work to friends/ family.

FIRSTSITE INSPIRED JUMPSUIT_

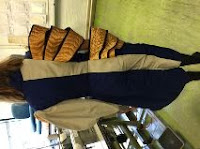
 FINISHED JUMPSUIT_


This was a really challenging garment to create. I struggled right from the beginning, when it came to designing the jumpsuit. Perhaps it was the way I first went about it, trying to create a jumpsuit from the off. The designs just weren't imaginative enough, mostly looking like a slightly altered jumpsuit block. Boring. It then came to my attention that creating designs similar to the way I was drawing first site and developing/refining the drawings, might be a better starting point. I began to cut out and layer up, and draw sketchy outlines and marks to envision a garment shape. This really was helpful, and from this I was able to refine the shapes by tracing them to make the garment more wearable.

I was skeptical about the idea of working and collaborating with someone to create the jumpsuit. I was more of an independent worker, and the thought of someone having to rely on me (and vice versa) didn't appeal to me. The idea of compromising on my design that I already liked was hard, however when I found out I had been paired with amber, things started to look up. Her design really worked with mine, and after some changes (collar, trouser length, the placement of the waist) the finished design was complete. It was almost as if it was meant to be- there was almost a diagonal line going across the front, balancing it.


It was a positive experience working in a pair. I feel it really helped me to learn to work in a team, which is valuable for later experience in the industry, where I will constantly have to compromise.

The process of creating the pattern ran rather smoothly. I became a lot more confident when altering the block to fit my design, and it was really helpful working alongside Amber to create the pattern as a whole, even though we were doing our own separate halves. We had a few dilemmas, such as how wide to make the legs, and the quilted panels had us stumped for a while. These were soon overcome with a little bit of help. The only thing I struggled with was comprehending what to change on the pattern to get the desired effect, and how that would look in a 3D form.


Putting the jumpsuit together was tough at times. The first task was to complete the quilted strips, and although this wasn't difficult, it was very time consuming. This put us behind the rest of the group, and the time schedule. This did start to panic me, however we both stayed for extra support sessions to catch up. Once the quilting and binding was completed, the rest of the jumpsuit was relatively simple, and the support module and semester 1 really helped me when it came to inserting zips and pockets, which were both used in the jumpsuit. Where I added the quilted panels into the seam, it became really thick to stitch through, so I also had to leave the edge un-overlocked.
Joining the two halves together went rather well, it was a back seam. I then added the zip at the front, which was a chunky zip. Because it was an open ended zip, I couldn't sew across the bottom. This created a pucker at the bottom, which wasn't attractive. I put a small hand stitch in the bottom to try and fix this- it made the situation better but didn't completely solve it. It wasn't visible from the outside, just the inside could have been a bit neater.
I were to do this again, with the experience I have gained, I would definitely take more time to make it to the standard I want. I am pleased with the overall appearance, however I feel I played it safe with the coloured panels. They were just big sections, which did work well with the detailed quilting, but perhaps alternating panels, such as on the trousers, would have created a more interesting approach. 
This garment and the design process was a huge confidence builder- my techniques and skills really improved. Also my ability to deal with things going wrong had to be put to the test- I would usually get flustered and annoyed quickly, however I tried to remain calm and just get on with, tackling any problems head on. When putting the jumpsuit together, visually things didn't work as planned, such as it was unnecessary to have a sleeve as the quilted panels covered it up. The jumpsuit without the sleeve worked rather well, showing a small amount of shoulder. The cuffs also seemed rather  pointless, and in fact it was hard to do any sort of cuff on Amber’s side due to the quilting being so thick. 
Creating this was a positive end to the first year, and I was very proud at how complex the garment looked! I cant wait to put my skills to the test next year and produce some more exciting things.